
 Rated 4.9 (811) Reviews
Tankless Water Heater Installation: A Step-by-Step Guide for Virginia Homeowners
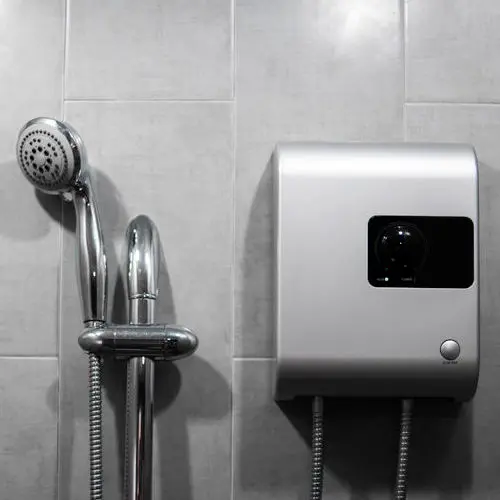
If you are considering tankless water heater installation in Virginia, you are probably looking for a more efficient way to keep hot water flowing without dedicating a large chunk of your utility room, basement, or garage to a traditional storage tank. Tankless water heaters can be an excellent option for Virginia homeowners, but installing one is not quite as simple as taking the old tank out and putting a smaller unit in its place. There are fuel connections, plumbing lines, electrical requirements, ventilation considerations, and local codes to think about. The good news is that you do not have to be a plumbing expert to understand how the process works. Think of this guide like a friendly shop class. We will walk through each major step, explain what matters, and help you know what to expect when a professional plumber handles the installation.
How Does a Tankless Water Heater Work?
Before getting into the installation process, it helps to understand what makes a tankless system different.
A traditional water heater stores a large amount of heated water inside a tank. The heater regularly turns on to keep that water warm, even when no one is using it.
A tankless water heater works differently. Instead of storing hot water, it heats water as you need it. When you turn on a hot water faucet, cold water travels through the unit. A gas burner or electric heating element quickly warms the water before sending it to your faucet, shower, dishwasher, or washing machine.
When you turn the water off, the unit stops heating.
That on-demand design provides several potential benefits, including:
- Less space required for the water heater
- Reduced standby energy loss
- A longer potential service life compared with many tank-style systems
- A continuous supply of hot water when the unit is properly sized
- Improved energy efficiency in many households
- Less risk of a large storage tank leaking dozens of gallons of water
However, getting those benefits starts with choosing and installing the right unit.
Step 1: Determine Whether a Tankless Water Heater Is Right for Your Home
The first step is not buying the heater. It is determining whether your house can support one.
A plumber will usually look at your existing plumbing system, household hot water usage, fuel source, available electrical service, ventilation options, and the location of the current water heater.
One of the biggest considerations is how much hot water your household uses at the same time.
For example, imagine someone is taking a shower while the dishwasher is running and another person turns on a bathroom sink. Your tankless water heater needs enough capacity to heat the combined flow of all those fixtures.
That is why tankless water heaters are typically sized based on flow rate rather than simply the number of gallons they hold.
A professional plumber can calculate the approximate gallons per minute your home requires and recommend a unit capable of keeping up.
Step 2: Choose the Correct Tankless Water Heater Size
Choosing the right size is one of the most important parts of the installation.
A unit that is too small may struggle when several people need hot water at the same time. You might notice the shower temperature dropping when someone starts the washing machine or turns on another faucet.
An oversized unit can create unnecessary upfront costs.
Your plumber will generally consider:
- Number of people living in the home
- Number of bathrooms
- Number of showers or tubs
- Dishwasher usage
- Washing machine usage
- Typical simultaneous hot water demand
- Incoming groundwater temperature
- Desired hot water temperature
Groundwater temperature matters more than many homeowners realize.
The colder the incoming water is, the harder the heater must work to bring it up to the desired temperature. Virginia experiences seasonal temperature changes, which means sizing should account for colder conditions rather than only warm summer weather.
Step 3: Evaluate Gas, Electric, and Utility Requirements
Next comes the part where professional experience becomes especially important.
Tankless water heaters may use natural gas, propane, or electricity. Each type has specific installation requirements.
Gas Tankless Water Heaters
Gas-powered tankless systems can require a substantial amount of fuel when operating.
The existing gas line that supplied your traditional water heater may not always be large enough for a tankless model. A plumber may need to evaluate:
- Gas line diameter
- Gas pressure
- Distance from the gas supply
- Other gas appliances in the home
- Total fuel demand
If the gas supply cannot support the new heater, the line may need to be modified or upgraded.
Electric Tankless Water Heaters
Electric models can require considerable electrical capacity.
Depending on the heater, the home may need dedicated circuits or electrical panel upgrades. A licensed professional can determine whether your existing electrical system is capable of safely supporting the unit.
This is not an area for guesswork. Water and high electrical loads are a combination that should always be handled carefully.
Step 4: Select the Installation Location
One of the nicest features of tankless water heaters is their compact size.
Because there is no large storage tank, the unit can often be mounted directly to a wall. Depending on the model and your home’s layout, installation locations may include:
- Utility rooms
- Basements
- Garages
- Mechanical rooms
- Interior utility closets
- Certain exterior locations when approved equipment is used
The installer will also need adequate access for maintenance.
It might be tempting to squeeze the heater into the smallest possible corner, but future service needs to be considered. Technicians should be able to reach connections, valves, filters, and other components without taking half the room apart.
Step 5: Shut Down and Remove the Existing Water Heater
Once the new system has been selected and the installation plan is ready, the old water heater needs to be disconnected.
The process generally begins by shutting off:
- Water supply
- Gas supply, when applicable
- Electrical power
- Relevant plumbing connections
A traditional tank must also be drained before it can be removed.
Even an old heater can contain many gallons of water, so proper draining is important. Simply disconnecting the plumbing without emptying the tank could create quite a mess.
The old heater is then removed from the installation area so the space can be prepared for the new unit.
Step 6: Prepare the Plumbing Connections
Here is where the system starts coming together.
The plumber will connect the home’s cold water supply to the tankless heater and connect the heater’s hot water outlet to the home’s hot water distribution lines.
Installers may also add service valves.
These valves are especially helpful because they make routine maintenance easier. A technician can isolate the heater from the rest of the plumbing system when flushing or servicing it.
Depending on the installation, additional components may include:
- Shutoff valves
- Pressure relief components
- Drain connections
- Pipe insulation
- Water filtration equipment
- Condensate drainage for certain high-efficiency units
The exact setup depends on the heater and the existing plumbing system.
Step 7: Install Gas or Electrical Connections
After the water lines are prepared, the heater needs its energy source.
For a gas system, the plumber will connect the appropriate gas supply and verify that the connection is secure. Proper gas pressure and pipe sizing are important for safe and reliable operation.
Electric systems require the proper circuits and electrical connections based on manufacturer requirements.
Homeowners should avoid treating this part of the project as a casual DIY job. Incorrect gas or electrical work can create serious safety hazards and may violate local building requirements.
Professional installation helps ensure the system is connected properly from the beginning.
Step 8: Install the Venting System
Gas tankless water heaters produce combustion gases that need to be safely directed outside.
That means proper ventilation is essential.
The type of venting required depends on the heater. Some models use specialized exhaust systems, while high-efficiency condensing units may have different venting requirements.
The vent location also matters.
Exhaust cannot simply be routed anywhere that seems convenient. Proper clearances may be required around windows, doors, air intakes, property features, and other openings.
A qualified installer will follow the manufacturer’s instructions and applicable local requirements when designing the vent system.
Step 9: Address Condensate Drainage When Necessary
Some modern tankless water heaters are condensing models.
These units capture additional heat from exhaust gases, which improves efficiency. During that process, however, they produce condensation.
That moisture needs somewhere to go.
The installer may need to connect the unit to an approved drainage location. In some situations, a condensate neutralizer may also be used.
It is a small detail, but it is an important one. Poor condensate drainage can eventually create moisture problems or damage components around the heater.
Step 10: Turn On the Water and Check for Leaks
Once the major connections are complete, the system is filled with water.
The plumber will carefully inspect fittings and connections for leaks.
Even a tiny drip deserves attention.
A connection that leaks only a drop every few minutes can eventually cause:
- Water damage
- Mold growth
- Corrosion
- Cabinet or drywall damage
- Higher water bills
Professional installers check the system before considering the job finished.
Step 11: Start the Heater and Test Its Performance
Now comes the satisfying part.
The tankless heater is powered on and tested.
The plumber may open several hot water fixtures to confirm that the system activates properly and produces the expected water temperature.
During testing, the installer may check:
- Water temperature
- Flow rate
- Burner operation
- Gas pressure
- Electrical performance
- Vent operation
- Error codes
- Water connections
- Drainage
Adjustments can then be made if necessary.
Step 12: Set the Water Temperature
Tankless systems typically allow homeowners to select the desired hot water temperature.
Higher is not always better.
Water that is excessively hot can increase the risk of scalding, especially for children, older adults, and anyone with reduced skin sensitivity.
Your plumber can help you choose an appropriate temperature based on your household.
Once everything is set, ask the installer how to adjust the temperature safely if you ever need to change it later.
Do Tankless Water Heaters Need Maintenance?
Yes.
Tankless does not mean maintenance-free.
Minerals naturally found in water can gradually collect inside the heat exchanger. Over time, that buildup may reduce efficiency or affect performance.
Routine flushing helps remove mineral deposits.
The appropriate maintenance schedule depends on factors such as:
- Water hardness
- Household water usage
- Manufacturer recommendations
- Heater design
- Previous maintenance history
A plumber may also inspect filters, vents, burners, electrical connections, drainage components, and valves during routine service.
Keeping up with maintenance can help your heater operate efficiently and may reduce the chance of unexpected problems.
Signs Something May Be Wrong After Installation
A properly installed tankless water heater should provide consistent performance, but problems can occasionally develop.
Call a plumber if you notice:
- Water suddenly becoming cold during use
- Unusual noises from the heater
- Error codes on the display
- Water leaking around the unit
- Weak hot water pressure
- The heater repeatedly shutting down
- Unusual odors
- Visible corrosion
- Significant temperature fluctuations
You should also take gas odors seriously.
If you suspect a gas leak, leave the area and follow appropriate emergency procedures rather than trying to inspect the heater yourself.
Why Professional Installation Is Worth It
There are plenty of household projects that make excellent weekend DIY jobs.
Tankless water heater installation generally is not one of them.
Installing the unit correctly may involve water plumbing, gas lines, electrical systems, ventilation, drainage, permits, and local building requirements. A mistake can affect far more than whether your shower gets warm.
Professional installation can help protect your home and ensure that the heater performs the way it was designed to perform.
It also gives you someone knowledgeable to answer practical questions such as:
- What temperature should I use?
- How often should the heater be flushed?
- Where is the shutoff valve?
- What does this error code mean?
- What should I do if the heater stops working?
- Which maintenance tasks should I schedule?
That kind of guidance can be especially valuable when you are switching from a traditional tank-style heater for the first time.
Frequently Asked Questions About Tankless Water Heater Installation
How long does a tankless water heater installation take?
Installation time varies depending on the home’s plumbing, fuel supply, venting needs, and whether the project involves replacing a traditional tank heater. More complicated conversions may take longer than a straightforward replacement.
Can a tankless water heater provide enough hot water for an entire house?
Yes, if the system is properly sized. The heater must be capable of handling your household’s maximum expected hot water demand.
Can I install a tankless water heater myself?
Professional installation is strongly recommended because the work may involve plumbing, gas, electrical, ventilation, and local code requirements.
Do tankless water heaters run out of hot water?
They do not store a limited tank of hot water. However, every unit has a maximum heating and flow capacity. If demand exceeds that capacity, performance can decrease.
Does a tankless water heater need to be flushed?
Usually, yes. Periodic flushing helps remove mineral deposits that can build up inside the system.
Can I replace my traditional water heater with a tankless model?
In many homes, yes. The conversion may require changes to gas lines, electrical service, plumbing, or venting, so the home should be evaluated first.
Are tankless water heaters more energy efficient?
They can reduce standby energy losses because they do not continuously keep a large tank of water hot. Actual energy use depends on the unit, household habits, fuel source, and installation.
Where can a tankless water heater be installed?
Possible locations include utility rooms, garages, basements, mechanical spaces, and other approved areas. The location must meet access, ventilation, plumbing, and manufacturer requirements.
What happens if my tankless water heater stops working?
Start by checking the unit for an error code or obvious power issue. If the problem is not immediately clear, contact a professional plumber rather than opening or attempting to repair the unit yourself.
Call Kinnett Plumbing for Tankless Water Heater Installation and Emergency Plumbing Service
A tankless water heater can be a smart improvement for your Virginia home, but the quality of the installation matters just as much as the heater you choose. Proper sizing, secure plumbing connections, correct ventilation, adequate fuel or electrical capacity, and professional testing all contribute to reliable performance.
Kinnett Plumbing is here to help homeowners in Woodbridge, VA, and surrounding areas handle water heater needs and unexpected plumbing problems with confidence. Our experienced team can diagnose plumbing issues, recommend practical solutions, and provide high-quality repairs with honest pricing.
Plumbing problems also have a habit of showing up at inconvenient times. A burst pipe, overflowing toilet, leaking plumbing fixture, or failing water heater can quickly create damage if it is not addressed. That is why our team is available 24/7 for emergency plumbing repairs. We arrive prepared to identify the problem and complete necessary repairs as efficiently as possible so you can get your home or business back to normal.
Whether you are planning a tankless water heater upgrade or dealing with a plumbing emergency right now, contact us for dependable service in Woodbridge and the surrounding Virginia communities.







 Jennifer Bishop