When you need slab leak repair in Northern Virginia, the first thing to remember is that the problem is fixable. A leak beneath a concrete foundation sounds intimidating, but an experienced plumber can locate the damaged pipe, explain the available repair methods, and help you choose a practical solution. The important part is acting quickly. Water leaking under your home can increase your utility bills, damage flooring, encourage mold growth, and weaken nearby building materials.
Think of a slab leak like a loose hose hidden beneath a heavy workbench. You may not be able to see the hose, but you can spot the effects of the escaping water. The floor may feel warm, your water bill may rise, or you may hear water running when every faucet is turned off. A plumber uses specialized tools to trace the problem before deciding how to reach and repair the pipe.
What Is a Slab Leak?
Many homes are built on concrete slab foundations. Water supply lines and other plumbing pipes may run beneath or through that concrete. A slab leak occurs when one of those pipes cracks, develops a pinhole, separates at a connection, or otherwise begins releasing water below the foundation.
Both hot-water and cold-water lines can leak. Hot-water slab leaks are sometimes easier to notice because they may create an unusually warm area on the floor. Cold-water leaks can be less obvious and may continue for a long time before visible damage appears.
Common causes of slab leaks include:
Aging or corroded pipes
Excessively high water pressure
Soil movement beneath the home
Normal expansion and contraction of pipes
Improper installation
Abrasion caused by a pipe rubbing against concrete or another pipe
Damage from long-term vibration
Shifting or settling of the foundation
A slab leak does not automatically mean your foundation is failing. In many cases, the problem is limited to a damaged plumbing line. However, the longer water is allowed to escape, the greater the chance of damage to flooring, walls, cabinets, and other parts of the home.
Warning Signs of a Slab Leak
Slab leaks rarely announce themselves with one unmistakable sign. Instead, homeowners often notice several small clues that do not seem connected at first.
Watch for the following warning signs:
A sudden or unexplained increase in your water bill
The sound of running water when fixtures are off
Warm or damp areas on the floor
Cracked, warped, or discolored flooring
Musty odors
Mildew or mold near the bottom of walls
Low water pressure
Water collecting near the foundation
A water meter that continues moving when no water is being used
Cracks developing in walls or flooring
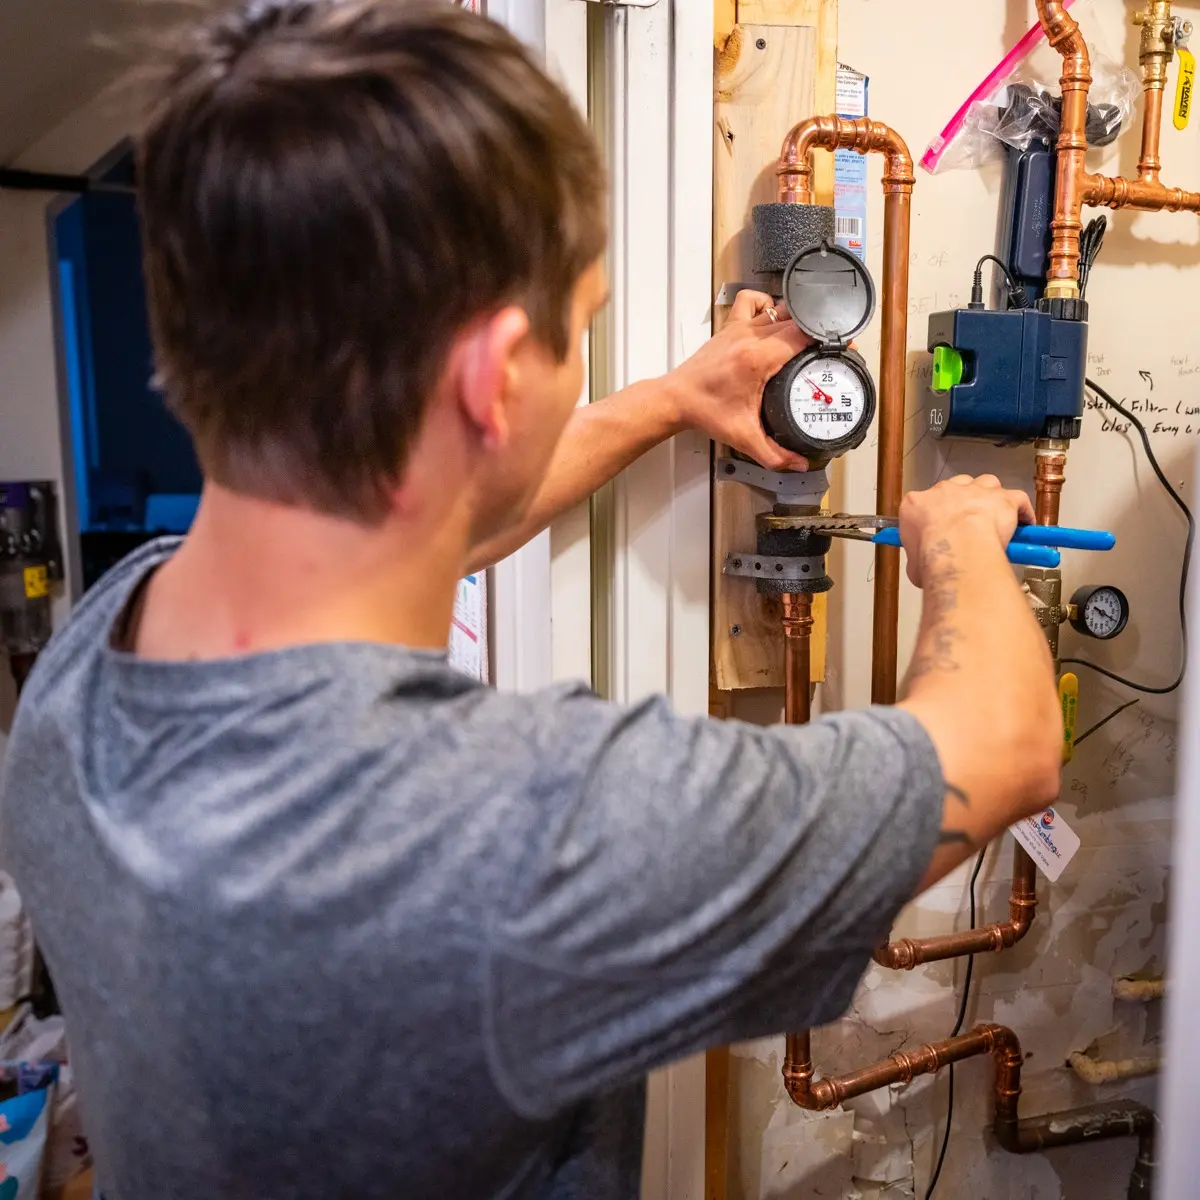
A higher water bill is especially important. Water rates can change, and household use can vary, but a large unexplained jump deserves attention. Turn off faucets, washing machines, dishwashers, ice makers, and other water-using appliances. Then look at your water meter. If it continues to register water use, you may have a hidden leak.
Do not start breaking through the flooring based on a guess. Slab leak detection should come before demolition. Accurate testing can reduce unnecessary damage and help the plumber select the least disruptive repair method.
What Happens During Slab Leak Detection?
The first service visit normally begins with questions. The plumber may ask when you noticed the problem, whether the water bill has increased, which rooms seem affected, and whether you have experienced previous leaks.
Next, the plumber may inspect exposed plumbing, flooring, walls, the water heater, and the area around the foundation. Depending on the situation, leak detection may involve:
Water pressure testing
Electronic listening equipment
Thermal imaging
Moisture meters
Line isolation tests
Video inspection equipment
Inspection of the water meter
Testing individual plumbing zones
Electronic listening equipment can help identify the sound created by pressurized water escaping from a pipe. Thermal imaging may reveal temperature differences associated with a hot-water leak. Moisture meters can identify damp areas that are not yet visible.
No single tool solves every case. A good diagnosis combines equipment readings with the plumber’s training and experience. The goal is to narrow the leak to the smallest practical area before recommending a repair.
What to Expect During Slab Leak Repair
After locating the leak, the plumber should explain what failed, where the problem is located, and which repair options make sense. There are several ways to repair a slab leak, and the best method depends on the location of the damaged pipe, the age of the plumbing system, and the condition of nearby lines.
Direct Access or Spot Repair
A direct-access repair involves opening the floor and concrete above the damaged section. The plumber removes enough material to reach the pipe, cuts out the failed section, installs new piping, and tests the repair.
This approach may be appropriate when:
The leak location is precise
The damaged area is easy to reach
The surrounding pipe is in good condition
Only one isolated section has failed
The flooring can be removed and restored reasonably
Spot repair can be effective, but it is not always the least expensive choice once flooring and concrete restoration are included. A leak under a utility room floor may be fairly manageable. A leak under custom cabinets, stone flooring, or a finished living area may require more extensive restoration.
Pipe Rerouting
Rerouting means abandoning the leaking section and installing a new pipe along a different path. The new line may run through walls, ceilings, an attic, or another accessible area rather than beneath the slab.
Rerouting may be recommended when:
The leak is difficult to access
Opening the slab would damage expensive finishes
The existing underground route is no longer practical
The pipe has multiple weak areas
A new route offers a more dependable long-term solution
Rerouting may sound like a larger project, but it can reduce concrete demolition and make future access easier.
Pipe Lining
In some situations, a damaged pipe can be repaired from the inside with an epoxy lining. The line is cleaned and dried before a coating is applied to seal small cracks or pinhole leaks.
Pipe lining is not appropriate for every plumbing system. A collapsed, badly corroded, or separated pipe may need to be replaced instead. Your plumber should inspect the line and explain whether lining is suitable for its size, material, and condition.
Partial or Whole-House Repiping
One slab leak does not always mean the entire house needs new plumbing. However, repeated leaks in older pipes may signal a system-wide problem. Repairing one weak section at a time can become frustrating and expensive.
A partial or whole-house repipe may be worth discussing when:
The home has experienced several leaks
The pipes are near the end of their expected service life
Corrosion is visible in multiple areas
Water quality has deteriorated
Water pressure is inconsistent
Several lines run beneath the slab
The cost of repeated repairs is approaching the cost of replacement
Repiping is a significant project, but it may provide better long-term value when the existing system has widespread deterioration.
How Much Does Slab Leak Repair Cost in Northern Virginia?
Slab leak repair prices vary widely because the phrase “slab leak repair” can describe anything from sealing a small section of pipe to rerouting multiple water lines.
Recent national cost guides place many slab leak repairs between approximately $630 and $4,400, with average projects around $2,300. Other published estimates place direct foundation access and pipe replacement between roughly $700 and $5,000, while more extensive rerouting or repiping can cost considerably more.
For planning purposes, homeowners may encounter costs such as:
Leak detection and diagnostic testing
Opening walls, floors, or concrete
Repairing or replacing the damaged pipe
Rerouting a water line
Pressure testing the completed work
Concrete patching
Flooring replacement
Drywall repair and painting
Cabinet removal or reinstallation
Water extraction and drying
Mold remediation when needed
A relatively accessible leak with limited damage may stay near the lower end of the range. A leak under finished flooring, built-in cabinetry, or a difficult part of the foundation can cost more. Whole-house repiping may reach several thousand dollars because it involves installing multiple new supply lines rather than repairing one isolated section.
Northern Virginia labor rates, home layouts, permit requirements, and building materials can also influence pricing. The only dependable way to know the cost for your property is to have the plumbing system inspected and receive a written estimate based on the actual repair plan.
What Factors Affect the Final Price?
The Location of the Leak
A pipe beneath an open utility area is usually easier to reach than one beneath a kitchen island, bathroom tile, staircase, or load-bearing wall. Difficult access increases labor and restoration costs.
The Repair Method
Direct repair, rerouting, pipe lining, and repiping involve different materials and labor. The lowest initial estimate is not always the best long-term choice. Ask how likely the surrounding pipe is to develop another leak.
Pipe Material and Condition
Copper, PEX, CPVC, and other materials require different repair techniques. Severe corrosion or multiple weak sections can turn a small repair into a larger replacement project.
Flooring and Interior Finishes
Concrete repair may represent only part of the total. Hardwood, tile, carpet, cabinets, drywall, and paint may need to be removed or restored.
Water Damage
Standing water can damage baseboards, insulation, drywall, flooring, furniture, and stored belongings. Drying and restoration may be necessary in addition to plumbing work.
Emergency Timing
An active leak cannot always wait until regular business hours. Emergency service may cost more, but quickly stopping the water can prevent a much larger damage bill.
How Long Does Slab Leak Repair Take?
A straightforward spot repair may be completed in a day once the leak is located and the work area is prepared. Rerouting may take one or more days, depending on the length of the new line and the number of walls or ceilings involved.
Repiping and extensive restoration can take longer. Your plumber should explain the expected schedule, which rooms will be affected, when the water must be turned off, and whether separate flooring or drywall contractors will be needed.
Leak detection is sometimes completed during the initial appointment, but difficult cases may require additional testing. Taking the time to locate the leak accurately is better than opening several areas based on guesswork.
What Should You Do While Waiting for a Plumber?
When you suspect an active slab leak, take simple steps to limit the damage:
Shut off the main water supply if water is actively spreading.
Turn off the water heater if the hot-water system is involved.
Move furniture, rugs, boxes, and valuables away from damp areas.
Avoid using electrical devices near standing water.
Take photographs of visible damage.
Record unusual water-meter activity.
Contact a plumber as soon as possible.
Notify your insurance company when significant damage has occurred.
Do not pour leak-sealing chemicals into your plumbing system unless a qualified plumber specifically recommends them. These products may not reach the damaged area and can complicate professional repairs.
Will Homeowners Insurance Cover a Slab Leak?
Coverage depends on the policy and the cause of the damage. Some homeowners’ insurance policies may cover sudden water damage to flooring, drywall, cabinets, or personal belongings. They may also cover some of the work required to access a leaking pipe.
However, the policy may not pay for the failed pipe itself. Damage caused by long-term neglect, gradual corrosion, poor maintenance, or an excluded foundation issue may not be covered.
Contact your insurance company promptly, document the damage, and ask for a clear explanation of:
Access coverage
Pipe repair coverage
Water-damage restoration
Mold limits
Deductibles
Required documentation
Contractor estimate requirements
Your plumber can document the leak location and recommended repair, but the insurance company determines coverage.
How Can You Reduce the Risk of Another Slab Leak?
Not every leak is preventable, but basic maintenance can reduce stress on your plumbing system.
Have your water pressure checked, especially if faucets bang, fixtures fail frequently, or supply lines seem to wear out quickly. Excessively high pressure places unnecessary force on pipes, valves, water heaters, and appliance connections.
Pay attention to your water bill and inspect exposed plumbing regularly. Small changes are easier to address before they become major emergencies. If your home has experienced repeated pinhole leaks, ask whether water chemistry, pipe age, electrical grounding, or high pressure could be contributing to the problem.
Most importantly, do not ignore early warning signs. Quick leak detection can mean the difference between a contained plumbing repair and a larger flooring and water-damage project.
Frequently Asked Questions
Is a slab leak an emergency?
It can be. Shut off the main water supply and call a plumber promptly if water is spreading, flooring is lifting, pressure has dropped suddenly, or you hear continuous running water.
Can a slab leak damage the foundation?
Yes. Long-term moisture can wash away supporting soil, contribute to movement, and damage nearby materials. Fast repair helps limit the risk.
Can I repair a slab leak myself?
Slab leak diagnosis and repair require specialized equipment and plumbing knowledge. A do-it-yourself attempt may damage flooring or concrete without reaching the actual leak.
Does every slab leak require breaking concrete?
No. Some leaks can be addressed through pipe rerouting or, in suitable cases, internal pipe lining. The best method depends on the pipe’s location and condition.
How do plumbers find a leak under concrete?
Plumbers may use pressure testing, electronic listening equipment, thermal imaging, moisture meters, and line-isolation tests to narrow down the location.
Why is part of my floor warm?
An unexplained warm area may indicate a leaking hot-water line beneath the slab. It can also have other causes, so professional testing is recommended.
Will the water need to be shut off?
Usually, yes. The plumber may shut off the entire home or isolate one part of the system. Ask how long the interruption is expected to last.
Is one slab leak a sign that I need repiping?
Not necessarily. One isolated failure may only require a local repair. Repeated leaks or widespread corrosion may make repiping more practical.
How can I tell whether the estimate includes restoration?
Ask for an itemized written estimate. Confirm whether concrete, flooring, drywall, paint, cabinets, cleanup, and permits are included or handled separately.
How quickly should I schedule service?
Schedule an inspection as soon as you notice warning signs. Hidden leaks usually become more expensive, not less expensive, when left alone.
Call Kinnett Plumbing for Slab Leak and Emergency Plumbing Service
A suspected slab leak is not a problem to put on next month’s list. The sooner the leak is located, the sooner you can protect your flooring, foundation, plumbing system, and belongings.
We provide professional slab leak repair and leak detection for homeowners in Northern Virginia, including Woodbridge, Manassas, Dale City, Lake Ridge, Centreville, Montclair, McLean, Reston, and surrounding communities. We also offer 24/7 emergency plumbing service for urgent problems such as burst pipes, severe leaks, overflowing toilets, backed-up drains, and failing water heaters.
When a plumbing emergency strikes, fast action matters. Our team arrives prepared to diagnose the issue, explain the repair options, and work toward a dependable solution. You receive experienced service, straightforward communication, and honest pricing during a situation that can otherwise feel overwhelming.
Contact us today to schedule slab leak detection, request a repair estimate, or get immediate help with a plumbing emergency in Woodbridge or the surrounding Northern Virginia area.
Sump Pump Maintenance Checklist: Protect Your Virginia Basement from Flooding
Sump pump maintenance is the routine inspection and testing of your sump pump system to ensure it removes groundwater effectively and prevents basement flooding. In Northern Virginia, especially in areas like Woodbridge, heavy rain and rising groundwater can overwhelm an unmaintained system. A simple 20 to 30 minute check every few months can prevent thousands of dollars in water damage.
Inspect and test your sump pump every 3 to 4 months
Always test before spring rains and hurricane season
Clean the pit and check the discharge line regularly
Replace aging pumps before they fail during a storm
Why Sump Pump Maintenance Matters in Northern Virginia
Your sump pump collects groundwater from around your foundation and pumps it safely away from your home. Without it, water can seep into your basement and cause structural damage, mold growth, and electrical hazards.
In Woodbridge and surrounding communities, heavy downpours and clay heavy soil can cause groundwater levels to rise quickly. When a sump pump fails during a storm, cleanup and repairs can easily reach several thousand dollars.
If you have experienced moisture issues before, scheduling routine residential plumbing maintenance is one of the smartest preventive steps you can take.
How a Sump Pump Works
A sump pump sits inside a pit called a sump basin, typically located at the lowest point of your basement or crawl space.
Groundwater collects in the sump basin.
A float switch rises with the water level.
When water reaches a set height, the pump activates.
Water is discharged through a pipe away from your foundation.
When properly maintained, this process is automatic and reliable. Problems occur when components clog, wear out, or lose power.
How Often Should You Inspect Your Sump Pump?
At minimum, inspect your sump pump:
Every 3 to 4 months
Before spring rainy season
Before hurricane or tropical storm season
After major storms
If your home depends heavily on the pump or has a history of flooding, monthly inspections are recommended.
Sump Pump Maintenance Checklist
Set aside about 20 to 30 minutes and follow these steps.
1. Confirm the Pump Has Power
Ensure it is securely plugged into a working outlet.
Avoid extension cords.
Use a ground fault circuit interrupter outlet if possible.
Check that any battery backup system is charging.
Loss of power is one of the most common causes of sump pump failure.
2. Test the Pump with Water
Slowly pour a bucket of water into the sump pit.
Watch the float switch rise.
Confirm the pump turns on automatically.
Ensure water drains quickly.
Verify the pump shuts off once water lowers.
If the pump does not activate, runs nonstop, or makes grinding noises, schedule professional sump pump repair immediately.
3. Inspect the Float Switch
The float switch controls when the pump turns on and off.
Ensure it moves freely.
Remove debris.
Check for tangled wires.
A stuck float can prevent activation or cause continuous running.
4. Clean the Sump Pit
Unplug the pump before cleaning.
Remove dirt, gravel, and debris by hand.
Clear sediment buildup around the intake screen.
Debris buildup reduces efficiency and increases wear.
5. Check the Discharge Line
Locate the exterior discharge point.
Remove leaves, mud, or obstructions.
Ensure water flows at least 10 to 20 feet from the foundation.
In winter, confirm the line is not frozen.
A blocked discharge line can force water back into your basement.
6. Listen for Unusual Sounds
A healthy pump produces a steady humming sound. Warning signs include:
Loud rattling
Grinding noises
Squealing
Excessive vibration
Mechanical wear should be addressed early to avoid total failure.
7. Inspect for Rust and Corrosion
Examine pump housing.
Check bolts and fittings.
Look for heavy corrosion.
Surface rust is common. Significant corrosion may signal replacement is needed.
8. Test the Battery Backup System
Virginia storms often cause power outages. A battery backup system keeps your pump running when electricity fails.
Confirm the battery is fully charged.
Follow manufacturer testing instructions.
Replace batteries every few years.
If you do not have a backup system, consider installing one before the next storm season.
Signs Your Sump Pump May Be Failing
Most sump pumps last 7 to 10 years. Watch for these warning signs:
Frequent cycling on and off
Continuous operation
Visible cracks or rust
Musty odors in the basement
Water pooling around the sump pit
If your system is aging and showing these symptoms, replacement may be more cost effective than repeated repairs.
Additional Flood Prevention Steps
Your sump pump is one layer of defense. Strengthen protection by:
Cleaning gutters and downspouts
Extending downspouts away from your foundation
Ensuring proper yard grading
Sealing foundation cracks
Installing a basement water alarm
Homes in Woodbridge with proper drainage systems experience significantly fewer basement water issues during heavy storms.
When to Call a Professional Plumber
Contact a licensed plumber if:
Your pump fails during testing
You notice electrical issues
Water is entering your basement
You need full sump pump replacement
You want a battery backup installed
During active flooding, do not delay. Immediate response from an emergency plumber in Woodbridge, VA can limit structural damage and mold growth.
Experience Insight from Local Plumbing Professionals
In our experience serving Northern Virginia homeowners, sump pump failures most often occur during the first major storm of the season. Systems that sit idle for months can develop stuck floats, dead batteries, or clogged discharge lines. A quick pre season inspection dramatically reduces emergency calls.
Preventive inspections cost far less than water damage restoration and mold remediation.
FAQ: Sump Pump Maintenance
How often should I test my sump pump?
You should test your sump pump every three to four months and before major storm seasons. Homes with a history of basement moisture or high groundwater levels may benefit from monthly inspections, especially during spring and hurricane season.
How long does a sump pump typically last?
Most sump pumps last between 7 and 10 years depending on usage, maintenance, and water volume. Pumps that run frequently or operate in sediment heavy pits may wear out sooner and should be monitored closely.
What happens if my sump pump fails during a power outage?
If your sump pump does not have a battery backup, it will stop working during a power outage. This is common during severe storms. Installing a battery backup system provides protection when you need it most.
Can I replace a sump pump myself?
Some homeowners can replace a sump pump, but proper sizing, discharge routing, and electrical setup are critical. Incorrect installation can lead to repeat flooding or code violations. Professional installation ensures reliable performance.
Bottom Line
Sump pump maintenance is one of the simplest and most cost effective ways to protect your Virginia basement from flooding. Regular inspections, basic cleaning, and backup system testing significantly reduce risk. Do not wait for heavy rain to discover a problem.
If you want peace of mind before the next storm, schedule a professional sump pump inspection with Kinnett Plumbing today.
A toilet that keeps running is usually caused by a worn flapper, faulty fill valve, misadjusted float, or chain problem inside the tank. When these parts fail, water continuously leaks from the tank into the bowl, forcing the fill valve to run nonstop. This can waste 200 to 1,000 gallons of water per day and significantly increase your utility bill. The good news is that most running toilets can be fixed quickly and affordably.
Running toilets can waste hundreds of gallons daily
Most repairs cost under $40 in parts
Flapper failure is the most common cause
Ignoring the issue can lead to higher water and sewer bills
Why Does a Toilet Keep Running?
A running toilet happens when water continuously flows from the tank into the bowl after a flush. The tank cannot properly seal or shut off, so the fill valve keeps refilling it. This creates a constant cycle of water movement.
Most Common Causes
Worn flapper
Loose or tangled chain
Faulty fill valve
Float set too high
Cracked overflow tube
The toilet tank acts as the control center. If one small component fails, the system cannot shut off correctly.
How Much Does a Running Toilet Cost You?
A leaking toilet can waste between 200 and 1,000 gallons of water per day. Even a slow leak adds up quickly.
Leak Severity
Estimated Monthly Cost
Minor Leak
$30 to $50
Moderate to Severe Leak
$100 or more
If you are connected to city sewer, you also pay sewer charges based on water usage. If you are on septic, excess water stresses your drain field. In both cases, ignoring the issue costs more over time.
If you are already seeing unexplained water bill increases, it may be time to schedule a professional plumbing inspection.
How to Tell If Your Toilet Is Leaking
Simple Food Coloring Test
Remove the tank lid carefully.
Add several drops of food coloring to the tank water.
Wait 15 minutes without flushing.
Check the bowl for colored water.
If color appears in the bowl, water is leaking past the flapper.
How to Fix a Running Toilet
1. Replace the Flapper
The flapper is the rubber seal at the bottom of the tank. Over time it can warp, crack, or lose flexibility.
Turn off the water supply valve.
Flush to drain the tank.
Unhook and remove the old flapper.
Match it at the hardware store.
Install the new flapper and reconnect the chain.
Turn water back on and test.
Most flappers cost under $15 and take less than 30 minutes to replace.
2. Adjust the Chain
The lift chain should have slight slack. If it is too tight, the flapper cannot seal. If too loose, it may get caught underneath.
Make small adjustments and retest after each change.
3. Adjust the Float
The float controls the tank’s water level. If set too high, water spills into the overflow tube.
Turn the adjustment screw on newer fill valves
Bend the float arm slightly on older models
The proper water level sits about one inch below the overflow tube.
4. Replace the Fill Valve
If you hear constant hissing, the fill valve may be failing. Replacement parts usually cost $20 to $40. Many homeowners can handle this repair, but if you are unsure, a professional toilet repair service can resolve it quickly.
When to Call a Professional Plumber
Some situations require expert help:
Cracked tank or bowl
Persistent leaking after replacing parts
Corroded internal components
Water pressure issues
If your toilet is older, upgrading to a high efficiency model may reduce long term water costs. In more urgent situations involving overflow or active leaking, contact an emergency plumber in Woodbridge, VA immediately.
Why You Should Not Ignore a Running Toilet
Higher water and sewer bills
Increased wear on plumbing parts
Risk of hidden leaks
Potential water damage
In our experience servicing homes throughout Woodbridge, small toilet leaks are often dismissed for months. Homeowners are frequently surprised when we calculate how much water has been wasted. Addressing the issue early prevents larger plumbing repairs later.
If you are experiencing multiple fixture problems, it may indicate a broader issue requiring professional residential plumbing services.
FAQ: Running Toilet Questions
How much water does a running toilet waste per day?
A continuously running toilet can waste between 200 and 1,000 gallons per day depending on the severity of the leak. Even a slow leak may add hundreds of gallons weekly, significantly increasing both water and sewer charges.
Is a running toilet an emergency?
A running toilet is not always an immediate emergency, but it should be repaired quickly. If the toilet is overflowing, leaking onto the floor, or causing water damage, it becomes an urgent plumbing issue requiring immediate professional attention.
Can I fix a running toilet myself?
Yes. Most running toilet problems involve replacing a flapper, adjusting a chain, or replacing a fill valve. These are affordable parts and manageable DIY repairs. If the issue persists after basic fixes, professional diagnosis is recommended.
How long does it take to fix a running toilet?
Simple repairs like replacing a flapper typically take 20 to 30 minutes. Fill valve replacements may take up to an hour. A licensed plumber can usually complete diagnosis and repair during a single service visit.
Bottom Line
A running toilet is more than an annoying sound. It is wasted water, higher utility bills, and unnecessary strain on your plumbing system. Most causes are simple and inexpensive to fix. Addressing the problem quickly saves money and prevents larger repairs.
If your toilet will not stop running and you want it handled correctly the first time, Kinnett Plumbing is ready to help homeowners in Woodbridge, VA and surrounding areas with fast, reliable solutions.
If you have ever stepped into the shower expecting a refreshing rinse and instead gotten a weak trickle, you already know how frustrating low water pressure can be. Water pressure is the force that moves water through your plumbing system. When that force drops, everything from showers to appliances can feel slower and less effective.
This complete guide explains the most common causes of low water pressure, how to diagnose the issue step by step, and which permanent solutions actually fix the problem long term. If you are in Woodbridge, VA or surrounding Northern Virginia areas, this also helps you know when it is time to call a professional.
What Is Considered Low Water Pressure?
Water pressure is measured in PSI, which stands for pounds per square inch. Most homes operate comfortably between 40 and 60 PSI. When pressure drops below this range, you may notice slow-filling sinks, weak showers, or appliances that take longer to run.
Common Signs of Low Water Pressure
Showers that do not rinse shampoo well
Faucets that sputter or fill slowly
Washing machines that struggle to complete cycles
Sprinklers that barely spray or have uneven coverage
If the issue happens at one fixture only, the cause is usually local. If it happens throughout the house, the problem is usually affecting your system as a whole.
Low pressure in several fixtures on the same floor
Partially closed valve, branch line buildup
Check shut-off valves and consider inspection
Low pressure everywhere in the home
Main valve partly closed, PRV issue, leak, supply issue
Check main valve, test PSI, look for leak signs
Pressure drops at certain times of day
Municipal demand peaks or supply fluctuations
Ask neighbors and test PSI at different times
Sudden pressure change across the whole house
PRV failure, new leak, supply event
Test PSI and contact a plumber for diagnosis
Schedule a water pressure diagnostic. If your pressure is low throughout the house or changed suddenly, a professional inspection can prevent leaks and costly damage.
Low water pressure always has a cause. Identifying the source is the fastest path to a real fix.
Clogged Pipes and Mineral Buildup
Minerals from hard water can build up inside pipes over time, reducing the diameter water can flow through. This is especially common in older homes and in homes with galvanized steel piping.
Common signs:
Gradually worsening pressure over months or years
Rust-colored water when turning on a faucet
Reduced flow even after cleaning fixtures
Faulty or Partially Closed Shut-Off Valves
If the main shut-off valve is not fully open, it restricts flow to the whole home. This can happen after plumbing work, a water heater replacement, or a previous shut-off event. This is one of the easiest and most overlooked causes to check.
Municipal Water Supply Issues
Sometimes low pressure is caused by the city supply and not your plumbing. Pressure can drop due to maintenance work, high demand during peak hours, aging infrastructure, or a nearby water main break.
If neighbors are noticing the same issue, that is a strong sign the cause is external.
Leaks Somewhere in the System
Leaks do not always create obvious puddles. Hidden leaks behind walls, under slabs, or in crawl spaces can reduce pressure while causing damage over time.
Common leak warning signs:
Unexpected increases in water bills
Damp spots on walls or floors
Musty or moldy odors
Sound of running water when no fixtures are on
Pressure Regulator Failure (PRV)
Many homes have a pressure-reducing valve that keeps incoming water pressure at a safe level. If the PRV fails, pressure can become too low or fluctuate unexpectedly across the home.
How to Diagnose Low Water Pressure Step by Step
Before making repairs, confirm what is happening and where. A systematic approach helps avoid wasted time and unnecessary replacements.
Step 1: Check Individual Fixtures
Test multiple faucets and showers. If only one fixture has low pressure, the cause is usually a clogged aerator, a dirty showerhead, or a localized plumbing issue.
Remove the aerator or showerhead and clean out debris or mineral deposits.
Step 2: Check the Main Shut-Off Valve
Locate the main shut-off valve and confirm it is fully open. Turn it gently counterclockwise until it stops. Also check secondary shut-off valves near water heaters and under sinks.
Step 3: Test Water Pressure With a Gauge
A water pressure gauge is inexpensive and easy to use. Attach it to an outdoor spigot or a laundry connection and record the PSI.
PSI Readings and What They Usually Mean
Gauge Reading
What It Indicates
Recommended Action
Below 40 PSI
Low pressure confirmed
Continue diagnosing valves, leaks, PRV, or supply
40 to 60 PSI
Normal range
Problem may be fixture-specific or flow-related
Above 60 PSI
Higher than typical
Consider PRV inspection to prevent damage
Step 4: Look for Signs of Leaks
Listen for water movement when everything is off. Check your water meter. If it moves when no water is running, a leak is likely present.
Step 5: Call a Professional for Advanced Diagnosis
If you cannot pinpoint the cause, professional tools like leak detection equipment and camera inspections can identify hidden problems quickly and accurately.
Get an expert diagnosis before replacing parts. If your PSI is below 40 or you suspect a hidden leak, schedule professional testing to avoid unnecessary repairs.
Some improvements help right away but do not address the underlying cause. Permanent solutions depend on what is actually failing.
Temporary Fixes That May Help Short Term
Cleaning aerators and showerheads
Confirming all shut-off valves are fully open
Replacing clogged fixture parts
Adjusting or replacing a problematic showerhead
Permanent Solutions That Actually Solve the Problem
Replacing old or corroded pipes
Installing a new pressure regulator (PRV)
Repairing hidden leaks
Upgrading outdated plumbing systems
Installing a booster pump when municipal pressure is consistently low
When a Booster Pump Makes Sense
In some homes, the city does not deliver enough pressure for consistent performance, especially in multi-story homes or properties far from main supply lines. A booster pump increases incoming pressure and distributes it more evenly.
Benefits of booster pumps include:
More consistent pressure on all floors
Better appliance performance
Improved shower and faucet experience
Booster pump installation should be handled by a professional to avoid damaging your plumbing system and to ensure proper settings and safe operation.
The Risks of Ignoring Low Water Pressure
Low water pressure is not just inconvenient. It can be an early warning sign of a bigger problem that gets worse over time.
Leaks that grow into water damage
Corrosion that spreads through pipes
Reduced appliance lifespan and performance
Mold growth from hidden moisture
Higher long-term repair costs
Why Professional Plumbing Help Matters
Plumbing systems have multiple connected components. What feels like a simple pressure issue can involve pipes, valves, regulators, leaks, or the municipal supply.
A professional plumber provides:
Accurate diagnosis
Specialized tools and equipment
Code-compliant repairs
Long-term solutions instead of guesswork
Safety and peace of mind
How Kinnett Plumbing Helps Homeowners Restore Water Pressure
If you are dealing with low water pressure or a sudden plumbing emergency, having a trusted professional matters. Kinnett Plumbing has years of experience helping homeowners in Woodbridge, VA, and surrounding areas diagnose and permanently fix plumbing issues.
Our team explains what we find, outlines your options clearly, and provides honest pricing so you can make the right decision for your home.
Ready to fix low water pressure for good? Schedule service with Kinnett Plumbing to get a clear diagnosis and a permanent solution.
Contact Us Today
Low water pressure does not have to be a mystery or a permanent annoyance. With the right diagnosis and proper repairs, your plumbing system can work the way it was meant to.
When a plumbing emergency strikes in Woodbridge, VA and surrounding areas, you need a reliable plumber who can respond quickly and efficiently. Whether you are dealing with a burst pipe, an overflowing toilet, or a failing water heater, fast action is essential to minimize damage and restore your plumbing system.
If low water pressure or any plumbing problem is disrupting your day, contact us and schedule service with professionals who treat your home with care.
Replacing a main water line is one of the most stressful plumbing projects a homeowner can face. It can feel expensive, disruptive, and hard to understand. The good news is that with clear information and a qualified local plumber, the process is usually straightforward.
Quick Answer: Main Water Line Replacement Cost in Northern Virginia
Most homeowners in Northern Virginia pay between:
$3,000 to $8,000 for main water line replacement
In more complicated situations, total cost can reach $10,000 to $15,000+, especially when the water line runs under hardscaping like driveways or sidewalks, the line is very deep, or the job requires emergency service.
Average Cost Chart (Northern Virginia)
Typical Main Water Line Replacement Costs
Project Type / Situation
Typical Cost Range
Short, easy-access replacement
$3,000 to $4,500
Standard replacement (average yard and depth)
$4,500 to $8,000
Long water line run (house far from street or meter)
$7,000 to $10,000+
Line under driveway, sidewalk, patio, or retaining walls
$8,000 to $12,000+
Emergency replacement or severe damage
$8,000 to $15,000+
Trenchless replacement (when possible)
$6,000 to $12,000
Costs vary by pipe length, depth, accessibility, permits, and surface restoration needs.
Your main water line is the underground pipe that delivers water from the city supply (or your well system) into your home. Every faucet, shower, toilet, and appliance depends on it.
When the main line starts to fail, problems can show up quickly throughout your home.
Common Signs of a Main Water Line Problem
If you notice one or more of these issues, your main water line could be leaking, cracked, or collapsing:
Low water pressure throughout the home
Discolored or rusty water
Unexplained puddles or soggy patches in the yard
Water pooling near the meter or near the foundation
Sudden spikes in your water bill
Damp spots in the basement or crawl space
Recurring plumbing issues that affect multiple fixtures
Why Main Water Lines Fail in Northern Virginia
Northern Virginia water lines face several common stressors that can cause failure over time:
Aging pipes made of galvanized steel or older copper
Tree root intrusion as roots search for moisture
Shifting soil and ground settling
Freeze and thaw cycles during winter
Corrosion from minerals in the soil or water
Accidental damage from nearby digging or construction
Some neighborhoods still have older water service lines that are more likely to corrode, leak, or break, especially after decades of use.
What Affects the Cost to Replace a Main Water Line?
Main water line replacement pricing varies because properties are not all built the same. Here are the biggest cost factors that determine the final total.
1) Length of the Water Line
The longer the line from the street connection or meter to your home, the higher the cost.
A longer run usually means:
More pipe material
More labor time
More excavation or trenchless work
Homes that sit farther back from the road tend to cost more.
2) Depth of the Water Line
In Northern Virginia, water lines are commonly buried several feet underground to help prevent freezing.
Deeper lines often increase cost because they require:
More digging
More labor and equipment
More time for safe installation and backfill
3) Pipe Material Selection
Modern main water line materials are designed to last longer and resist corrosion better than older pipes.
Main Water Line Material Options
Water Line Material
Benefits
Common Use Cases
Copper
Long lifespan, strong, reliable
Homes prioritizing durability
PEX
Flexible, corrosion-resistant
Cost-effective replacement option
HDPE
Durable and often used for trenchless work
Minimal digging installations
A qualified plumber can help you choose a material that fits your home, budget, and local code requirements.
Does Homeowners Insurance Cover Main Water Line Replacement?
In most cases, homeowners insurance does not cover main water line replacement unless the damage was caused by a covered event.
Some homeowners have added protection through:
Utility company service line protection programs
Third-party service line warranties
Optional endorsements through insurance providers
It is worth checking your policy so you understand what is included before a problem occurs.
Why Hiring the Right Plumber Matters
Replacing a main water line is not a DIY project. Hiring the right plumber makes a major difference in cost accuracy, speed, and long-term reliability.
Look for a company that provides:
Clear written estimates
Proper licensing and insurance
Local experience in Northern Virginia conditions
Knowledge of permitting and inspection requirements
Honest recommendations and transparent pricing
Emergency availability when needed
What to Expect During the Main Water Line Replacement Process
A professional water line replacement process usually follows these steps:
Inspection and diagnosis
Estimate and repair vs replacement recommendation
Permits and utility locating
Replacement installation (excavation or trenchless)
Pressure testing and verification
Site cleanup and restoration planning
Good communication from your plumber matters, especially if water service is temporarily shut off.
When a Water Line Problem Becomes a Plumbing Emergency
Some water line issues can wait for scheduling. Others should be treated as urgent.
Call for emergency plumbing help if you have:
No running water
Water flooding into your home
A major leak in the yard near the foundation
Rapidly worsening pressure loss
Water damage affecting floors, walls, or electrical areas
Fast response helps minimize damage and may reduce overall repair costs.
Final Thoughts on Main Water Line Replacement Cost in Northern Virginia
Replacing a main water line is a big decision, but it is also a long-term investment in your home’s safety and reliability. A properly installed water line improves water pressure, prevents recurring leaks, and protects your home from costly emergencies.
If you suspect a problem, do not wait until a small leak turns into major damage.
Contact Us Today
If you are dealing with water line concerns or need emergency plumbing service in Woodbridge, VA and the surrounding Northern Virginia area, Kinnett Plumbing is ready to help.
Our team can inspect your main line, explain your options clearly, and provide honest pricing so you can make the right decision for your home.
A member of our team will be in touch shortly to confirm your contact details or address questions you may have.
[contact-form-7 id="104" title="Contact form 1"]
Proudly Serving Manassas, VA and Surrounding Areas

 Rated 4.9 (974) Reviews








 Jennifer Bishop